Wednesday, December 8, 2010

DIY: Mini Christmas bunting

Hi all,

Christmas is coming! Feeling the Christmas spirit yet?

I'm back with a simple little DIY project that I came up with for the season.
It's really easy to do and will only take up like 15 minutes of your time.


It's a mini Christmas bunting!
Here's the materials you need:

1) Red & White felt
2) Twine (the one I got is a lovely red and natural twist from Ikea)
3) Hot glue gun
4) Cardboard cut-outs of the shapes you'd like to use
5) Scissors and black marker

Trace out the shapes using your cardboard cut-outs onto the red felt. I drew stockings and mittens but you can also use shapes like Santa's hat or presents

Cut them out

Cut out a strip of white felt for the fur trim (mine is half a centimeter thick in proportion to my red stockings and mittens)

Hot glue the white felt to the stockings and mittens as a fur trim.

Cut a length of twine, length depending on where you want to hang it. I cut out 1 metre and used about 12 stockings and mittens on it. Place a small glob of hot glue onto the back of the stockings and mittens and press the twine into it, spacing them out evenly

And you're done!

Isn't it quick and easy to do? And it looks really adorable as well. I'm going to hang this at my desk at work and bring a little Christmas cheer into my office!


Saturday, November 27, 2010

Big Craft Shopping Spree

Finally pay day is here haha!
Went on a shopping spree yesterday and bought a whole lot of pretty craft stuff. Probably spent a bit more than I'm supposed to but I just couldn't resist. Anyway they made me so happy so it's worth it.

Here are my loots:

Lovely mini paper suitcases from Paper Market...my favourite purchase for the day

Looking at these made me so happy, they are just too adorable for words! I wish I have my craft desk right now so I can display them there and just look at them while I craft.
I mean how perfect they would look on this desk below!!


Also from Paper Market, washi tapes! My fav is the merry-go-round one :)

Stamps and more washi tape from NBC

These lovely matryoshka doll stamps actually do not fit into the theme of my handmade gifts for this year but they are too adorable to pass up. Gonna use them for my next project!

Did I mention that I love Ikea?? Can't wait to wrap my presents! But the brown paper I bought isn't exactly kraft paper though, it's the normal brown parcel paper. And it's really cheap, only $1.50 for 8m. I can use it for the external wrapping of my parcels so that my gift wrap doesn't get ruined during delivery.


So happy with my purchases! Ok time to stop fawning over them and get back to work on my Christmas gifts! Can't wait to show you how they turn out!


Thursday, November 18, 2010

STOP.REWIND

I really got to stop browsing and drooling through all these fabulous design/handmade/inspiration blogs online(will share links later!). I keep adding all these insanely easy to do and gorgeous crafts to my list!! All of them are just screaming out to me "Make me!" and I want to make them all!

Only 2 things will come out of this scenario:
1) my house will become overrun with craft supplies, half completed/on-going projects and my family will have no place to sit
2) my gifts to my dearies will have to be delivered by UPS or DHL cos they're too stuffed full of my handmade stuff thus either the package will be either too big or too heavy to be delivered by normal post. (I won't even start to imagine what it would cost to mail a 2kg package over to Nikky in Idaho!)

So clearly some reining in of this madness is in order.
This is my plan:
1) hold off any more buying of craft supplies
2) completely declutter and reorganize my scrapbooking cupboard and corner (it'll help me find out what materials I have so I don't buy extras and also have space for the new stuff)
3) make a list of what I want to do and stick to it!! (Christmas is just one month away!)
4) schedule time to do my crafts and make sure I complete them

And repeat this madness all over again for Valentine's Day (lol)

Sent from my iPhone

Sunday, November 7, 2010

Zakka Love

I have been negligent in updating my blog lately, my bad.
These past few weeks were consumed by brainstorming, designning, sourcing and crafting my Christmas gifts for this year. Yes I'd started my Christmas preparations in October this year haha because I know it'll take me a long time to get everything done if I'm going handmade gaga.

My plans for Christmas handmade bonzana 2010!
1) Handmade personalised organiser cover and pouch for my besties
2) CD case calendar for office mates
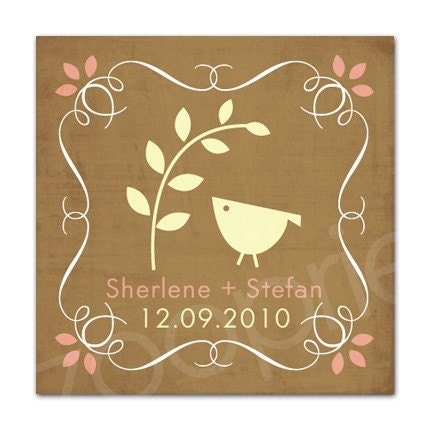
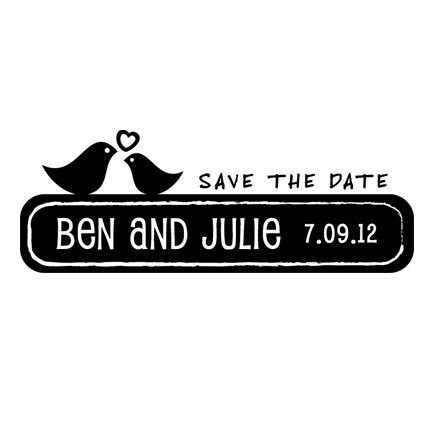
3) Embellished packaging and gift tags

That's a lot of work so I thought I better get started early cos I'm such a slow worker haha.

For my pouches and organiser covers, I went with a simple looking vintage Parisian chic design. At lfirst I did wonder why I was so obsessed with this style but then I figured it must have been all those wedding inspiration and home decor blogs I have been reading everyday. Then I looked around the stores and I see Effiel Towers and Parisian elements everywhere. The Zakka movement is gaining momentum in Singapore!

What's Zakka you say? Well according to Wikipedia:

Zakka (from the Japanese 'zak-ka'(雑貨)or 'many things') is a fashion and design phenomenon that has spread from Japan throughout Asia. The term refers to everything and anything that improves your home, life and appearance. It is often based on household items from the West that are regarded as kitsch in their countries of origin, but it can also be Japanese goods, mainly from the fifties, sixties, and seventies. In Japan there are also so-called Asian zakka stores; that usually refers to Southeast Asia. The interest in Nordic design or Scandinavian design, both contemporary and past, is also part of this zakka movement. Zakka can also be contemporary handicraft.
Zakka has also been described as "the art of seeing the savvy in the ordinary and mundane". The zakka boom could be recognized as merely another in a series of consumer fads, but it also touches issues of self-expression and spirituality. "Cute, corny and kitschy is not enough. To qualify as a zakka, a product must be attractive, sensitive, and laden with subtext."
Source: Wikipedia

When one menttions Zakka, one has to mention Shinzi Katoh, a famous Zakka designer and artist.


One of his 2011 schedule books, love the Little Red Riding Hood design. Been seeing this concept in loads of scrapbooking stuff this year.

He even has tea tins!! I'll love to start a collection of these


Pinocchio pouch. Adorable. ;)


Guess what this is? Measuring cups!


He even has iPhone cases!! This reminds me of the ones I buy from Gmarket hehe

All items above can be found at Shinzi Katoh's online shop

As you can see, the Zakka movement is a little whimsical, a little fairytale and a little vintage. If you find it familiar, that's because you've probably seen a lot of similar things in Korean stationery shops that's the current craze in Singapore this year. To me, it's the stuff of daydreamers. Love the whole lot of them.

And these are the Zakka items I bought from Etsy for my DIY Christmas 2010:


From top left: Velvet iron-on transfers - Vintage Stamp Series, Cotton fabric strip with black writing, Velvet iron-on transfers - Travel, Garden and others, Sewing Machine, Thread, Bread, Crown Zakka Linen Tape

 From diycloset on Etsy


From top left: Antique Bronze Lovely Key Charms,  Antique Bronze MADE WITH LOVE Oval Charms, antique Bronze 3D Effiel Tower Charms, Antique Bronze Split Love Letter Scroll Charms, Antique Gold Heart Lock Charms

I'm afraid I can only post how I used them and the finished product closer to Christmas. Don't wanna spoil the surprise here!


Monday, October 11, 2010

Love Etsy

I love Etsy. Love browsing through it's myriad of unique vintage handmade products. I'm so envious of the plethora of talented people out there! I wish I could create just like them.

I've been itching to get something off the gorgeous world of Etsy, especially all those lovely bridal accessories and customised rubber stamps and stickers for favours. But the words "Too early!" and the shipping costs always held me back.

But! But! There are Etsy stores in Singapore! That is to say we have a lot of talented people based locally so shipping shouldn't be that big a problem! Glee!

One off my best finds is Zoopri


Zoopri has a wide range of gorgeous stamps and paper goods which are perfect for weddings, holidays, special occasions and businesses.
Design from Zoopri

Design from Zoopri

Design from Zoopri

Design from Zoopri

I can't wait to order from her for my wedding favours!! So pretty! Check out her store here


Thursday, September 23, 2010

Great Find: Insanely Beautiful Webbies with Free Treasures galore!

I've been so bad neglecting this blog of mine but I'd been through quite a dry spell lately, racking my brains for ideas and designs for my bridesmaid invite cards. It has been quite frustrating.

But it turns out my muse is the good old internet. You wouldn't believe the number of kind hearted talented souls out there. In this weeke alone I came across 3 fantabulous wedding blogs that blew me aaway with the gorgeousness of their creations and posts. And best of it all, these angels are offering their works of art for free!!
God Bless You all!!

Now introducing the blogs every bride who's interested in making her wedding totally beautiful and customised MUST VISIT (esp DIY brides cause you'll die in DIY heaven at these sites)

First up is Ruffled.

This blog has the most amazing DIY freebies. And they update reguarly featuring wedding inspirations, real weddings and goodies from other fabulous wedding sites. Love browsing through this blog!

One of my favourite projects featured in Ruffled is this really unique ring holder. I myself have been sourcing for ideas to DIY my ring holder because I totally do not want the traditional ring pillow. It's boring and no one knows what to do with it after the ceremony other than to stick it in some box and collect dust haha.

I want something that we can put on our dresser to keep our wedding bands safe when we take them off each night.
And i found this idea really interesting. It's perfect for book loving couples or vintage themed weddings.

Creator: Brittni from papernstitch
Image taken from Ruffled
You can jump straight to this project here
DIY Vintage Book Ring Holder

Next up is Wedding Chicks (love the name!)

They showcase gorgeous real weddings and photos as well and what's unique about this site is that they do customised tote bags and t shirts for your weddings! These tote bags would be perfect for your bridesmaids and the t shirts are a nice variation for your groomsman especially if you're doing a casual fun wedding.


Get your customised mini-totes from Wedding Chicks!

When I saw the DIY Fabric Envelopes project, I couldn't wait to try it for myself!!

Image from Wedding Chicks

So simple and yet sooo pretty!!
Project can be found here: How to make Fabric Envelopes

Another really useful webbie is Project Wedding.

It has loads of tips and tons of useful articles and also step by step DIY instructions teaching you to amke gorgeous items like these:

Image from Project Weddings

You can find the instructions here: DIY: Gorgeous Chiffon and Tulle Flowers

I found this interesting site while browsing through wedding blogs called Nonpareil Magazine.
It's done magazine style with issues and all and you get pages and pages of really lovely photos aand inspirations and articles.
They also have free downloads like these gorgeous invitations below:


Free Humming Bird Wedding Invitations

Ooo la la such gorgeousness!! These sites have given me such inspiration and browsing through them everyday is such a pleasure, especially on crappy days. Beautiful things cheer me up!

Monday, August 30, 2010

Love Note #1

We had a fabulous little holiday in Redang a couple of years ago, our first together. We loved swimming in their clear waters but I'm not a strong swimmer so when I got tired he piggybacked me and swam back to shore. When we got back to shallower waters, the sand was covered in pokey little coral pieces, not piercing but still uncomfortable to walk on. He refused to put me down and carried me even though it meant him walking very gingerly through all the sharp pieces with me on his back, just so I won't hurt my feet.


Monday, August 23, 2010

Great find!! iDiY - design goodies for 'i-Do'-it-Yourself weddings

I'm so excited!!
I found a great webbie with loads of free DIY templates and goodies, tips, tutorials and inspirations!!
What a goldmine!

It all came about when one of my besties posted a pic of an organiser cover I made a couple of years ago for Christmas pressies. I had bought inexpensive organisers from Popular bookstore and jazzed it up by scrapping the covers. Looking at the designs now, I find them so amateurish but she treasured it and cut it out from the organiser and kept it as a bookmark *so touched*

So I resolved to make them something better this year. Something useful and gorgeous and totally customised for each of them as a Christmas present. I was googling for ideas and chance across this site

'i Do' it Yourself

It's filled with truckloads of free templates and clip art and soooo many pretty things!!

Since I've been itching to get my hands deep into glue and paper and all things craft but it's still waay too early to get started on my DIY projects for my big day (i always hear a loud 'Siao ah!!' and eye-rolling big enough to move boulders when I say I wanna start buying supplies), so I thought a good project to keep me busy would be handmade invites to the 8 lovely ladies I wanna ask to be my jie meis. Most of them know that they'll be part of my entourage but I've always feel it would feel nice to be formally asked and if it's through a gorgeous handmade card, it'll be all the more memorable and sincere wouldn't it?

Just a little sampler of the goodies available on the site:

A gorgeous apple green striped stationery set featured on the website.


this is so dainty, lovely for a simple card


This is so exciting! There are so much stuff that I couldn't even begin to introduce them all. Anyone interested in a little DIY must visit the site!
I can't wait for the weekend to come again so that i can sit all at my lappie all day and DIY! 


Saturday, August 14, 2010

DIY Project: Small Light Tent for Photography

So happy with my little successful DIY project!!

I've been wanting to get a small light tent for taking photographs of the small items I'd bought. It beats seeing my ugly sofa, tablecloth or floor tiles in the background. I was thinking of going down to Funan Centre to get one but as I was researching shops that carry them, I found that they are sold on ebay too.


A light tent kit with 2 lamps costs $199!!! That's a little pricey for me.
So what's a poor artist gotta do?
Luckily for me, I found a post on someone's blog where they DIYed it themselves!  So I followed the instructions from this link and made my own light tent!!

Here's my materials:


1) Cardbox box. You can use any box you may have around your house or from your office. Size is according to your preference. Like for myself I prefer a slightly larger box in case the items I buy may be a little big. Found this box in my house ad it measures an average of about 29cmx25cm.
2) 2 large pieces of heavy paper. This can be found in Popular at the paper section. You'll need one black and one white. They only cost $1.70 each.
3) Tracing paper. Also found in Popular. Costs $1.50.
4) Black tape.
5) Other tools: pen knife, long ruler, marker and Blu-Tac. Easily found in many homes.

Firstly, you cut out holes in 3 sides of the box, leaving a 2 to 3cm border around the edge so that your box will not collaspe. If your box is made of a stiffer material then 2 cm will do.


I reinforced the border with black tape to make it more sturdy.


Next, you cut out 3 pieces of tracing paper slightly bigger than the holes you've cut out and tape them securely in place. Make sure it's tight. Like this:


Then you cut out a piece of black paper to line the back of your box like so:


Using the white paper, cut out a piece measuring only the width. You do not need to shorten the length to fit  the box. Secure the white paper to the back using Blu-Tac.


Tadah, the box is done!!

Now you'll need your lighting. If you have any desk lamps at home, they'll come in handy. But I did not have any so trusty Ikea comes to the rescue.


Only $14.90! Cheap cheap! I bought a pair.


Ready for shooting!

Easy to do right? And it only costs me about $37!! That's like a fraction of what it'll cost me to buy a professional one.

Now to see my test shots!


Heehee Wall E at work.

LinkWithin

Related Posts with Thumbnails